Snow White
Sometimes the timing is perfect.

We had a costume party coming up, with an 'S' theme.
And Sew a Little Seam released the Once Upon a Pattern.

So the ultimate Snow White costume came to life.

The original plan was to make it out of poplin. Pretty cheap, and easy to sew. But when I walked into the fabric store, I couldn't resist the satin on sale. And it really wasn't as bad as I thought it would be. As an added bonus, I found some ITY in a similar blue for the back of the dress.

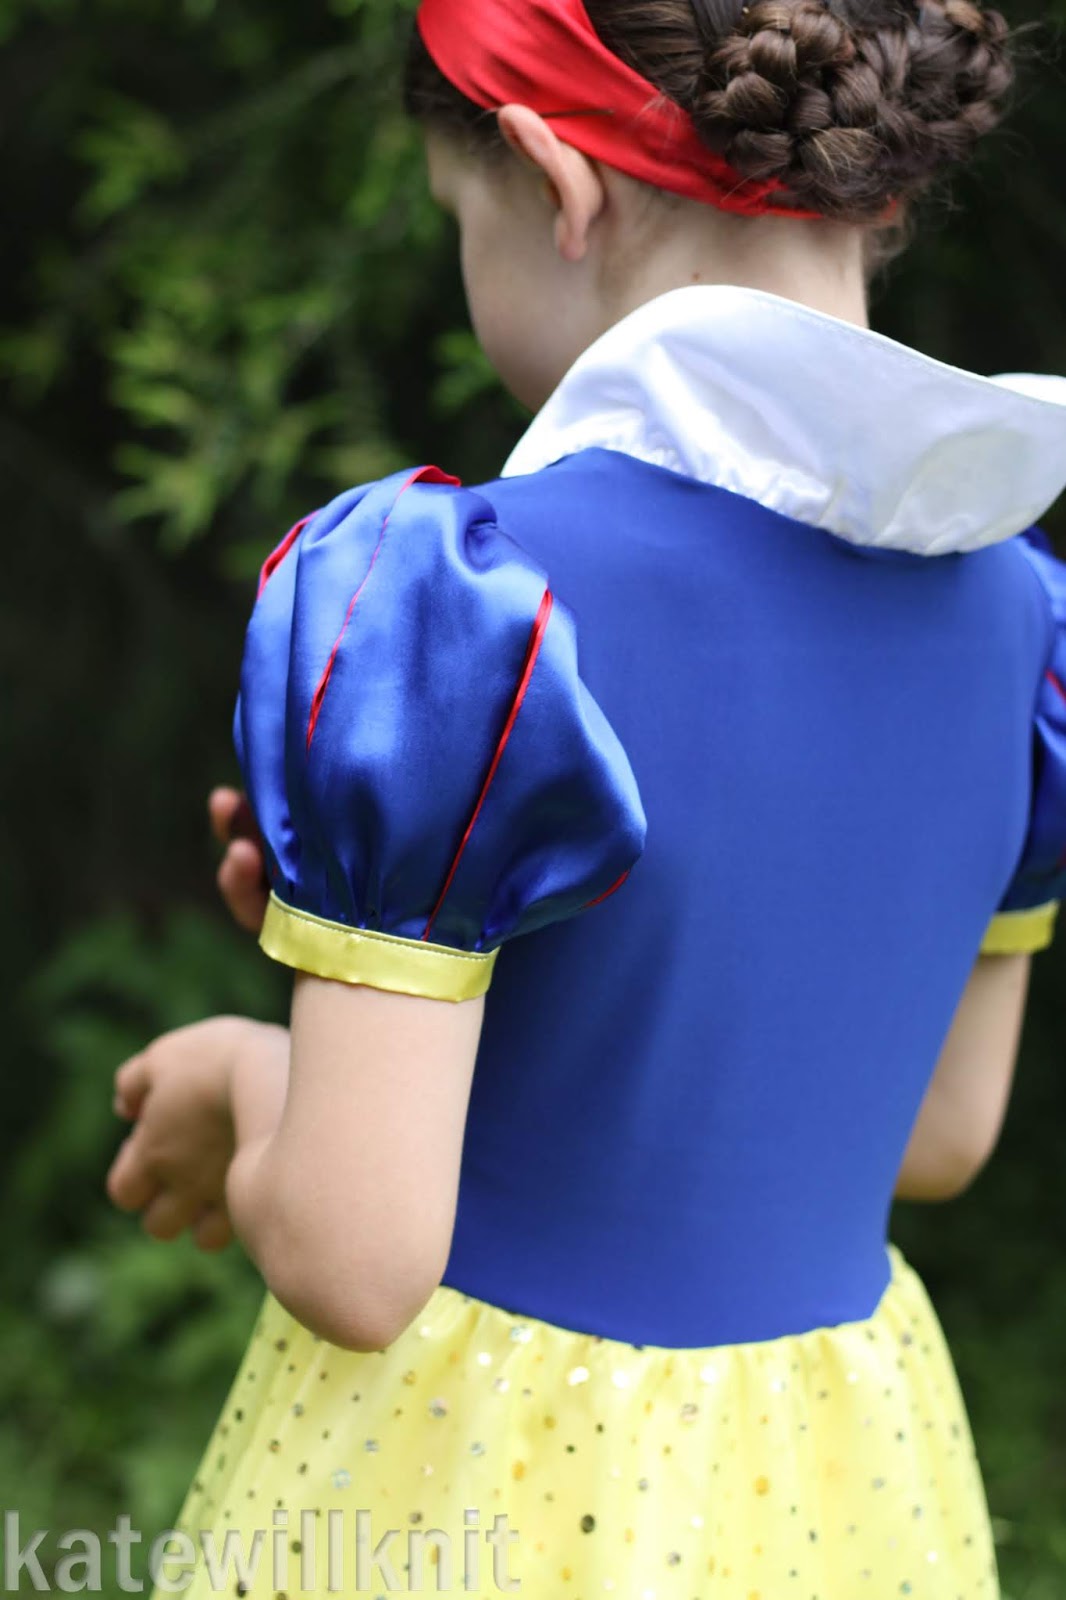
I added contrast fabric pleats to the sleeve, gold braid to the front, and a sparkly tulle overskirt.

The pattern includes instructions on adding trim to the sleeves, but I wanted full on princess pleats. I made the pleats by marking off sections on the sleeve piece. I traced around the sleeve pattern, adding seam allowance to each section, so there were 6 sections for each sleeve. I cut rectangles of the contrast fabric to form the pleats, then basted the pleats in place and trimmed the excess fabric away.

I used washaway Wonder Tape to hold the braid in place while I sewed it in place. I managed to sew the braid, positioning the sewing needle between the sections of braid so that it is barely visible.

Sewing the satin wasn't too difficult. I used a microtex needle when sewing the satin (I used a stretch needle when sewing the ITY). To avoid lots of satin fluff everywhere, I made sure I overlocked the raw edges as soon as they were sewn. And I overlocked the top edge of the skirt before gathering to save it unravelling while positioning the gathers.

I went a little off course with the neckline and medici collar. First of all, I used a rather heavy interfacing on the collar (pro tip - read the pattern before cutting, don't just go off the pattern pieces), so it's pretty stiff, and was tricky to gather. Secondly, I cut the round neck for the back, as I couldn't visualise a square neck at the back with the collar. However looking at the instructions, the square neck was used for the back. I was a little worried it wouldn't be easy to get on or off, and there is a little bit of wiggling, but she can do it mostly herself.

The pattern has the back of the bodice in knit fabric to avoid using zippers as a closure - the dress can be taken on and off as it is. I think next time I use the pattern I'll have a go at adding a zipper. I just didn't have time to mess about much with the pattern this time round.

There are lots of options with the pattern - for all sorts of Princess (and other character) dresses, pants and tops). With all those options, the instructions are rather long. But each page has a series of links at the top to make it easy to get to the right section quickly.

Her headband was made using a tutorial for a knit fabric headband and bow as a starting point (here), but sewing each end of the headband through a hair band for stretch. You can kind of see the hairband in the photo above. It was pretty quick, but came together very nicely.

Needless to say, I'm pretty happy with how the dress turned out. Her reaction to the finished dress was just what I had hoped. And of course, she looked fantastic at the party (even though I spent most of it with a slightly bruised apple in my handbag).


We had a costume party coming up, with an 'S' theme.
And Sew a Little Seam released the Once Upon a Pattern.

So the ultimate Snow White costume came to life.

The original plan was to make it out of poplin. Pretty cheap, and easy to sew. But when I walked into the fabric store, I couldn't resist the satin on sale. And it really wasn't as bad as I thought it would be. As an added bonus, I found some ITY in a similar blue for the back of the dress.

I added contrast fabric pleats to the sleeve, gold braid to the front, and a sparkly tulle overskirt.

The pattern includes instructions on adding trim to the sleeves, but I wanted full on princess pleats. I made the pleats by marking off sections on the sleeve piece. I traced around the sleeve pattern, adding seam allowance to each section, so there were 6 sections for each sleeve. I cut rectangles of the contrast fabric to form the pleats, then basted the pleats in place and trimmed the excess fabric away.

I used washaway Wonder Tape to hold the braid in place while I sewed it in place. I managed to sew the braid, positioning the sewing needle between the sections of braid so that it is barely visible.

Sewing the satin wasn't too difficult. I used a microtex needle when sewing the satin (I used a stretch needle when sewing the ITY). To avoid lots of satin fluff everywhere, I made sure I overlocked the raw edges as soon as they were sewn. And I overlocked the top edge of the skirt before gathering to save it unravelling while positioning the gathers.

I went a little off course with the neckline and medici collar. First of all, I used a rather heavy interfacing on the collar (pro tip - read the pattern before cutting, don't just go off the pattern pieces), so it's pretty stiff, and was tricky to gather. Secondly, I cut the round neck for the back, as I couldn't visualise a square neck at the back with the collar. However looking at the instructions, the square neck was used for the back. I was a little worried it wouldn't be easy to get on or off, and there is a little bit of wiggling, but she can do it mostly herself.

The pattern has the back of the bodice in knit fabric to avoid using zippers as a closure - the dress can be taken on and off as it is. I think next time I use the pattern I'll have a go at adding a zipper. I just didn't have time to mess about much with the pattern this time round.

There are lots of options with the pattern - for all sorts of Princess (and other character) dresses, pants and tops). With all those options, the instructions are rather long. But each page has a series of links at the top to make it easy to get to the right section quickly.
Her headband was made using a tutorial for a knit fabric headband and bow as a starting point (here), but sewing each end of the headband through a hair band for stretch. You can kind of see the hairband in the photo above. It was pretty quick, but came together very nicely.

Needless to say, I'm pretty happy with how the dress turned out. Her reaction to the finished dress was just what I had hoped. And of course, she looked fantastic at the party (even though I spent most of it with a slightly bruised apple in my handbag).


Comments
Post a Comment