Frida by Designer Stitch
Ann Grose from Designer Stitch* has come up with another beautiful pattern.

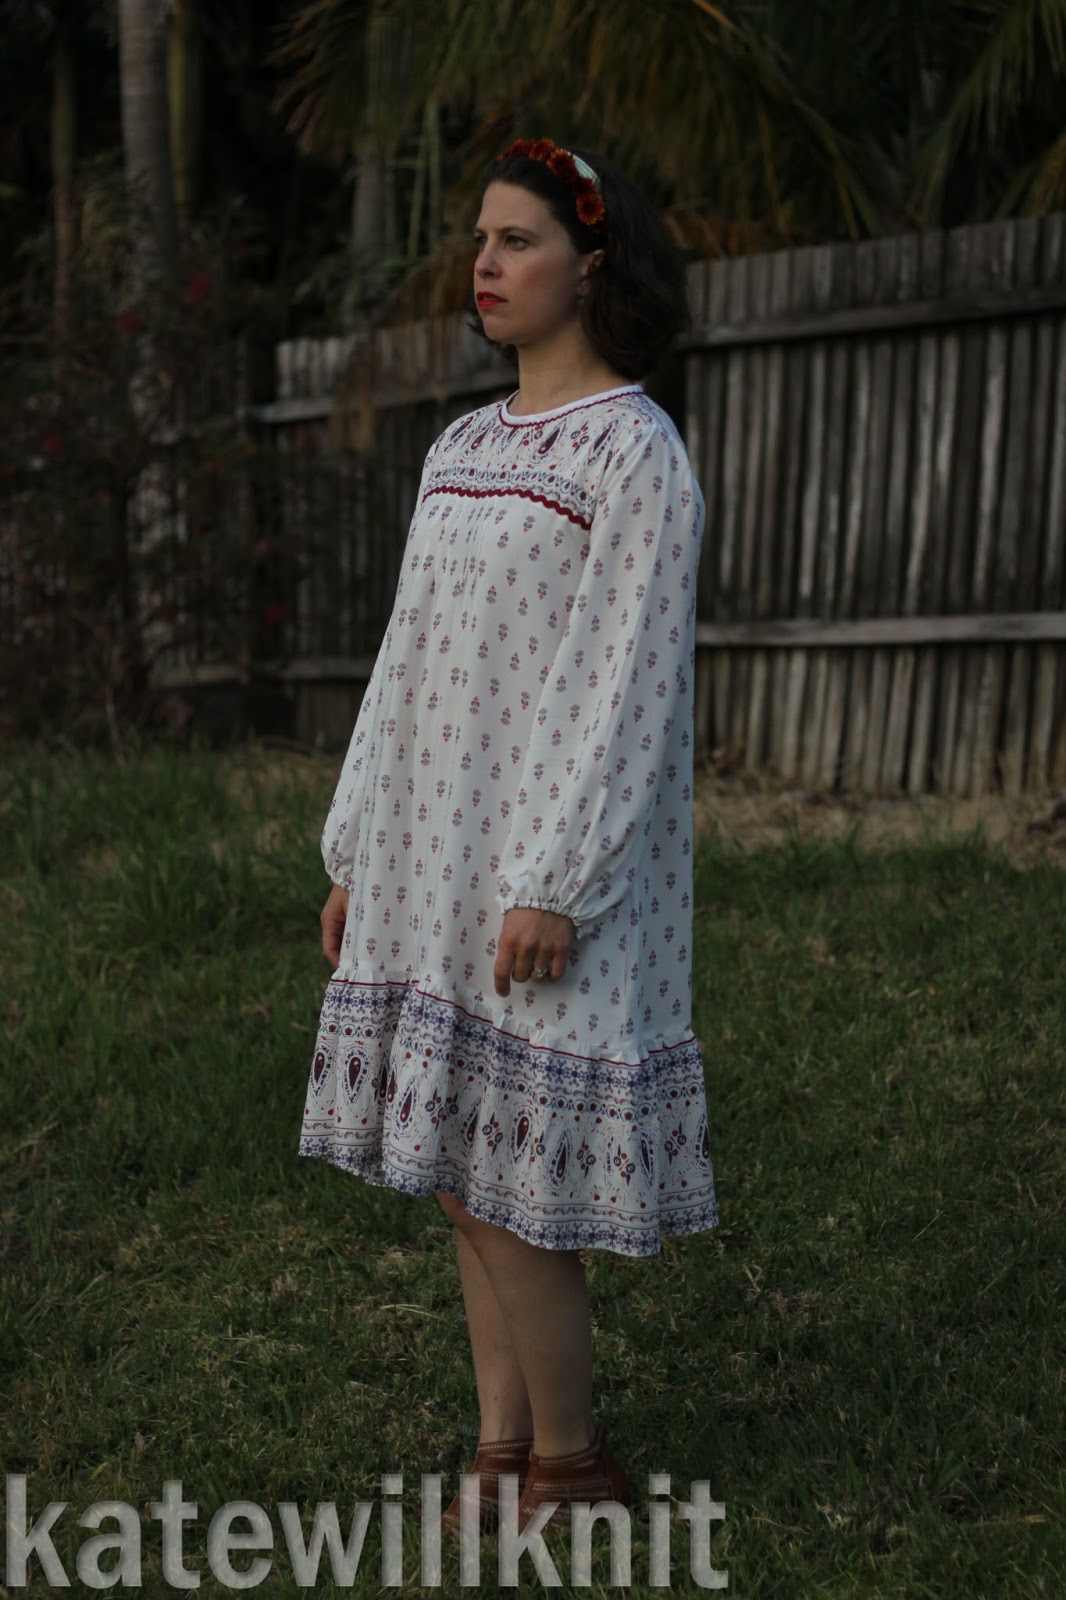
The Frida Dress (and Tunic) has just been released, and it is stunning.

Inspired by the Mexican Folk Art style of Friday Kahlo, There is plenty of scope for combining bold fabrics, embroidered motifs, border prints and trims to make a unique garment.

There are options for tunic and dress length, with and without the ruffle. There are also four sleeve options: long; short; puff and bishop. I sewed up the dress with ruffle, using the bishop sleeves.

Choosing a size was pretty easy for me. All Designer Stitch patterns are based on the same sizing, so I made my standard size 3 bust, size 4 waist and size 5 hip. It's easy to adjust the curve from the bust to the waist. Then I redrew the side seam line, so that the dress would finish at the same width as the size 4. Given the amount of fullness in the skirt, I probably could have gotten away without grading out at the hips, but I was naughty and didn't make up a toile (muslin) first.

I used a rayon border print I found in the clearance section at Spotlight. I bought 3.5 or 4m (I can't remember how much). The flounce at the bottom used so much fabric that I only had enough border left for the front bodice (which saved me pattern-matching trauma at the side seams). I was a little worried that the fabric would be too sheer for a dress. But so far so good. I did wear a nude slip under the dress for photos just to be on the safe side.

The pattern looks amazing in embroidered fabrics too. I have some white with a blue trim that I have earmarked for a Frida beach covering this summer.
The pattern is on sale for release via the Designer Stitch Pattern Store. Ann also has prepared some blog posts talking about the inspiration for this pattern, and what the testers were up to.

Read on for more information about construction techniques and the sewing process.
The neckline is bound with a piece of bias fabric, and it's a beautiful finish. It ties in nicely with the rouleau used as a button loop. There are pintucks on the front of the pattern, to help with the shaping of the bodice. I was a bit nervous about pintucks at first, but they were quite simple in the end.

I used pins to mark the edges of the pleat, folded the fabric so the two pins lined up, pinned it to the end of the line, then pressed in place.

Because my fabric was a little see through, I could then see that I had lined up the edge properly, as I folded one side of the fabric back out to finish the pleat.

A couple more pins to hold it all in place, then stitching.

I had lots of different trims that I was thinking of using. I really liked this large floral trim. But when I tried it up against where the seam would sit, it was too overwhelming. So I ended up back with ricrac (two thicknesses in the same colour). I was a bit naughty adding trim - I should have added it before sewing those sleeves in, then the edges would have been caught nicely in the seam allowance. But I was too keen to start, and undecided in my trims, so didn't follow the instructions properly. I should know better with Ann's patterns - it pays to follow her instructions.

I recommend Frida as a summer or transeasonal piece of clothing. It will certainly be featured on my summer wardrobe.
*This pattern contains affiliate links. If you click through and make a purchase I receive a small commission at no extra cost to you. However the opinions, sewing and desire to stick flowers in my hair are all my own.

The Frida Dress (and Tunic) has just been released, and it is stunning.

Inspired by the Mexican Folk Art style of Friday Kahlo, There is plenty of scope for combining bold fabrics, embroidered motifs, border prints and trims to make a unique garment.

There are options for tunic and dress length, with and without the ruffle. There are also four sleeve options: long; short; puff and bishop. I sewed up the dress with ruffle, using the bishop sleeves.
Choosing a size was pretty easy for me. All Designer Stitch patterns are based on the same sizing, so I made my standard size 3 bust, size 4 waist and size 5 hip. It's easy to adjust the curve from the bust to the waist. Then I redrew the side seam line, so that the dress would finish at the same width as the size 4. Given the amount of fullness in the skirt, I probably could have gotten away without grading out at the hips, but I was naughty and didn't make up a toile (muslin) first.

I used a rayon border print I found in the clearance section at Spotlight. I bought 3.5 or 4m (I can't remember how much). The flounce at the bottom used so much fabric that I only had enough border left for the front bodice (which saved me pattern-matching trauma at the side seams). I was a little worried that the fabric would be too sheer for a dress. But so far so good. I did wear a nude slip under the dress for photos just to be on the safe side.

The pattern looks amazing in embroidered fabrics too. I have some white with a blue trim that I have earmarked for a Frida beach covering this summer.
The pattern is on sale for release via the Designer Stitch Pattern Store. Ann also has prepared some blog posts talking about the inspiration for this pattern, and what the testers were up to.

Read on for more information about construction techniques and the sewing process.
The neckline is bound with a piece of bias fabric, and it's a beautiful finish. It ties in nicely with the rouleau used as a button loop. There are pintucks on the front of the pattern, to help with the shaping of the bodice. I was a bit nervous about pintucks at first, but they were quite simple in the end.

I used pins to mark the edges of the pleat, folded the fabric so the two pins lined up, pinned it to the end of the line, then pressed in place.

Because my fabric was a little see through, I could then see that I had lined up the edge properly, as I folded one side of the fabric back out to finish the pleat.

A couple more pins to hold it all in place, then stitching.

I had lots of different trims that I was thinking of using. I really liked this large floral trim. But when I tried it up against where the seam would sit, it was too overwhelming. So I ended up back with ricrac (two thicknesses in the same colour). I was a bit naughty adding trim - I should have added it before sewing those sleeves in, then the edges would have been caught nicely in the seam allowance. But I was too keen to start, and undecided in my trims, so didn't follow the instructions properly. I should know better with Ann's patterns - it pays to follow her instructions.

*This pattern contains affiliate links. If you click through and make a purchase I receive a small commission at no extra cost to you. However the opinions, sewing and desire to stick flowers in my hair are all my own.


Comments
Post a Comment